
Dieser Beitrag ist auch verfügbar auf:
![]() Deutsch
Deutsch
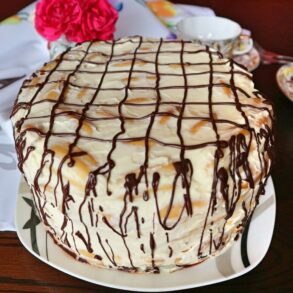
Loose choux pastry and delicate sour cream make a heavenly delicious combination of flavors that make up the Russian cake “Damskie palchiki”. It tastes airy, fresh and not too sweet. Consisting of many small “fingers” and decorated with chocolate glaze, the choux pastry cake is also a sweet eye-catcher on the dining table. To make it yourself, you only need a few common ingredients, which you may even already have at home and don’t have to go shopping for. A detailed recipe for the Russian choux cake “Damskie palchiki” with exact quantities and step-by-step instructions can be found below.
What does the name of the choux cake mean?
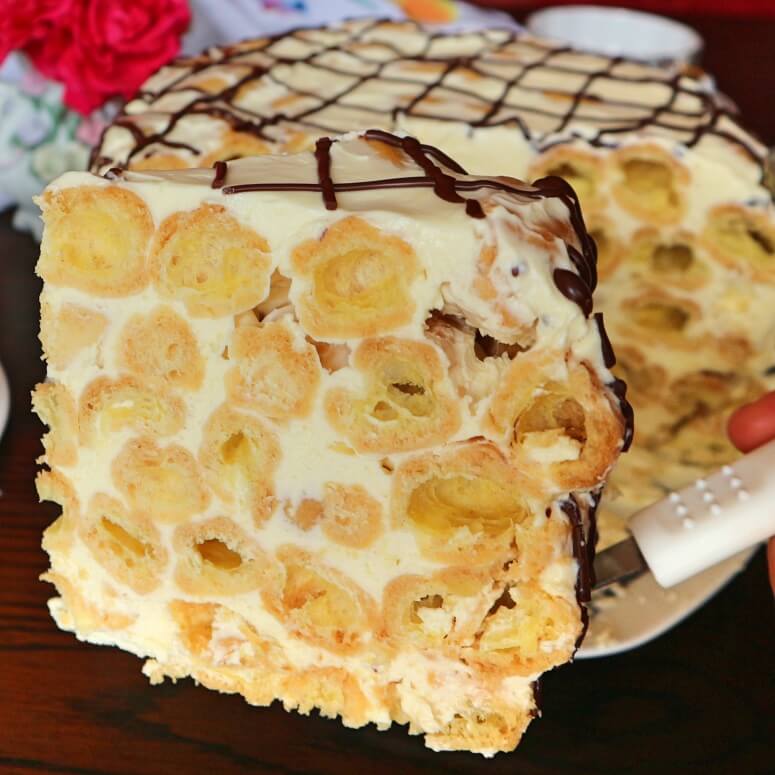
“Damskie palchiki” translated from Russian means “lady’s fingers”. The cake is made of small choux pastry pieces that resemble a finger. Such pastries are obtained by depositing small strips of choux pastry on the baking sheet with the help of a piping bag and then baking them.

Additionally with fruit, nut or chocolate flavor
Often the cake “Damskie palchiki” is made additionally with berries, nuts or chocolate. Depending on your taste, you can also do it. To do this, on each layer of choux pastry fingers dipped in the cream, add a layer of fresh fruit, chopped or ground nuts or chocolate chips. I had made the choux pastry cake before with fresh berries. It had tasted fruity and light. Especially in the summer it is an ideal dessert.
Easy and so delicious
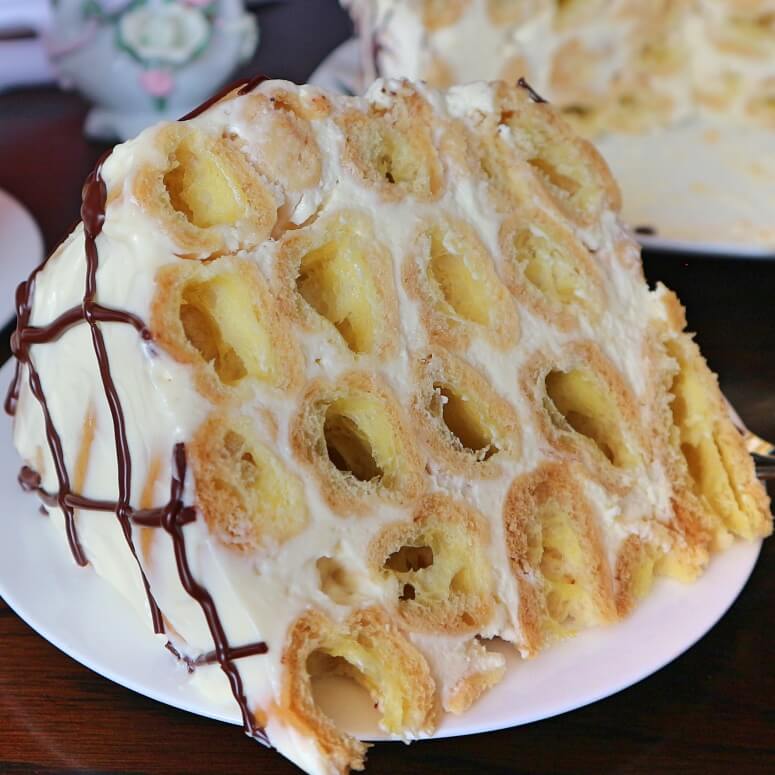
Although the cake is quite simple, consisting only of choux pastry pieces and an ordinary sour cream, it tastes delicious. Each cake piece, which looks like a honeycomb on the sides, also immediately catches the eye visually and attracts all the attention at the dining table. So you can serve the choux cake for dessert during the week or on the weekend, as it doesn’t take much effort to make. But it is also ideal for a celebration. For example, refine the cake with fresh fruit and serve it at a summer party. Or make it with nuts for the Christmas party.
How to store the choux pastry cake “Damskie palchiki”?
Immediately after making, you should refrigerate the “Damskie palchiki” cake for a few hours. During this time, the cream can set and combine well with the choux pastry. After that, the Russian cake can be served. Keep the rest of the cake in the refrigerator and consume it within the next 2-3 days at the latest. The longer you store the cake, the more the choux pastry will soften and become less fluffy.
The cake “Damskie palchiki” is
- fluffy,
- tender,
- airy,
- refreshing,
- light,
- not too sweet,
- very tasty,
- a sweet eye-catcher on the dining table,
- fancy looking after cutting,
- perfect for dessert during the week or for a party,
- easy to make yourself from a few common ingredients,
- about Ø 24 cm big,
- classic of Russian cuisine.

Choux cake “Damskie palchiki”: the recipe
The exact quantities and step-by-step instructions, according to which you can make the Russian choux cake “Damskie palchiki” yourself, you can find here below in the box recipe.
The recipe for the cake is quite easy. You just need to make the choux pastry, whip the sour cream from three ingredients and then form the cake. That’s it.
For the choux pastry, as always, you need butter, eggs, water, flour and a small amount of salt. For the cake cream, you only need sour cream, powdered sugar and vanilla. Decorate the choux cake with chocolate glaze, which consists of dark chocolate and butter melted together.
How to make cake “Damskie palchiki”: this is how it works
- For the dough, briefly boil butter, water and salt and remove from heat. Stir in flour quickly and burn the dough until it comes off the bottom of the pan as a lump, leaving a white layer of starch. Let the dough cool to lukewarm and stir in as many eggs, one at a time, until it shines and hangs in peaks on a wooden wooden spoon. Pour the batter into a piping bag, pipe small strips onto a baking sheet lined with baking paper, bake at 190 °C for about 30 minutes until golden brown and let cool.
- For the cream, beat sour cream, powdered sugar and vanilla until creamy.
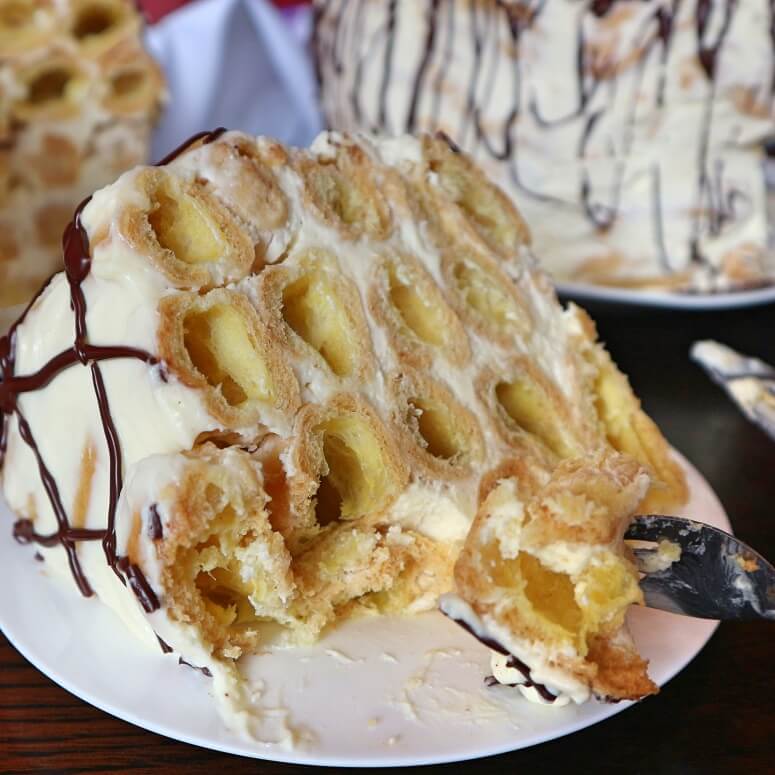
- Dip the choux pastry fingers into the cream and stack them on top of each other in the shape of a cake. Chill the cake for a few hours and decorate with the chocolate glaze. Done!
Tips and tricks: how to make the Russian choux cake
- Water and butter should only be brought to the boil briefly. The butter must be melted before boiling. Therefore, use room-warm butter and cut it into pieces before adding it to the water. If the water is about to boil before the butter has melted, take the saucepan off the heat, stir it until the butter melts, and then put it back on the heat.
- Flour should be added in one swoop to the hot water-butter mixture as soon as you take it off the heat, and stir briskly and thoroughly, preferably with a wooden cooking spoon.
- The dough dumpling must be burned, i.e. heated in the saucepan with constant stirring and turning, until it has separated from the bottom of the saucepan as a dumpling and left a white starch layer.
- Eggs should only be added to the choux pastry when it has cooled down to lukewarm, otherwise you might get boiled eggs in the dough.
- For the choux pastry, the right consistency is very important. For this reason, the amount of eggs in the recipe is always approximate. You might not need the last egg completely, or you might need a small amount of one more egg in addition. So, to get your choux pastry the right consistency, proceed as follows: Don’t add the last egg directly into the dough, but whisk it in a small bowl and add this egg to the dough in small portions, stirring the dough each time with a wooden spoon or hand mixer until it has a homogeneous consistency. Once your choux pastry is shiny and hangs in peaks on a wooden cooking spoon, it’s ready and doesn’t need another egg.
- Immediately pour the choux pastry into a piping bag or continue to process it after it’s done so it doesn’t dry out.
- To pipe “fingers” out of the choux pastry, you will need a star nozzle as well as a piping bag. As an alternative to the star-shaped nozzle, you can use a round, approx. Ø 8 mm hole nozzle.
- Since the choux pastry fingers grow larger during baking, leave enough space between them on the baking tray.
- Do not take the choux pastry fingers out of the oven too early, otherwise they might collapse. They are done baking once they have turned a golden brown color. Do not open the oven door during baking.
- The choux pastry has turned out perfectly when your “little fingers” are very light and firm on the outside after baking.
- As vanilla for the cream go among other things vanilla sugar, vanilla powder, vanilla extract or vanilla bean scraped out.
- You can also form the cake without a cake ring. To do this, stack the choux fingers dipped in the cream on top of each other in layers in the shape of a circle.
Did you make the Russian cake “Damskie palchiki” according to this recipe? I’m looking forward to your result, your star rating and your comment on the recipe below, how you succeeded and tasted the choux cake.
Fancy more delicious recipes with choux pastry? Try also:
- Cream puff recipe: how to make profiterole filled with cream
- Choux pastry rings with curd – Russian curd rings with French background
- How to make eclairs – recipe for world-famous French choux pastry
Cake "Damskie palchiki" (Russian choux cake)
Equipment
- piping bag with star nozzle
- Ø 24 cm large cake ring
Ingredients
for the dough
- 150 g butter
- approx. 7 eggs
- 375 ml water
- 225 g flour
- 1 pinch of salt
for the cream
- 1 kg sour cream
- 280 g powdered sugar
- vanilla
for the chocolate glaze
- 30 g dark chocolate
- 15 g butter
Instructions
Preparation of the dough
- Put softened butter, water and salt in a saucepan and boil briefly, stirring constantly. (The butter must be melted before boiling).
- Take the saucepan off the heat, immediately add flour and mix briskly with a wooden wooden spoon until a large dough ball has formed.
- Put the saucepan back on the stove and heat the dough, stirring and turning it with a wooden spoon, for about 1 - 2 minutes, until the dough comes off the bottom of the saucepan as a dumpling, leaving a white layer of starch.
- Take the saucepan off the heat, transfer the dough to a clean mixing bowl and let it cool to lukewarm.
- Using a wooden wooden spoon or a hand mixer, gradually stir in as many eggs to the batter one at a time until it is shiny and clings to a wooden spoon in peaks. It is best to whisk the last egg in a small bowl and add just enough of it to the dough until it has the right consistency. The batter should be creamy, definitely not runny or firm. (I used 6.5 L size eggs).
- Fill the batter into a piping bag with a star-shaped nozzle and pipe small strips ("fingers") about 5 cm long onto a baking sheet lined with baking paper, leaving enough space between them.
- Bake the choux pastry fingers in a preheated oven at 190 °C top and bottom heat for about 30 minutes until golden brown and let them cool.
Preparation of the cream
- Whip sour cream, powdered sugar and vanilla until creamy.
Shape the choux cake
- Place the cake ring on a flat plate. Dip the choux pastry fingers one by one into the sour cream and spread them side by side, pressed against each other, in layers on the plate inside the ring, so that a cake is formed. Then chill the cake for a few hours.
Preparation of the chocolate glaze
- Melt the dark chocolate and butter together.
- Remove the cake ring from the cake and decorate it as desired with the chocolate glaze.
Notes
- Bring water with butter to the boil only briefly. The butter must be melted before boiling.
- Add flour in one go immediately to the hot water-butter mixture as soon as it is removed from the heat.
- Make sure to burn off the dough dumpling.
- Add eggs only to the choux mixture when it has cooled to lukewarm.
- The right consistency is very important for choux pastry. The amount of eggs is given in the recipe only approximately. Add only enough eggs to the choux mixture until the choux dough is shiny and clings in peaks to a wooden wooden spoon.
- Do not take the choux fingers out of the oven too soon, or they may collapse.
- You can also form the cake without a cake ring. To do this, stack the choux pastry fingers dipped in the cream on top of each other in layers in the shape of a circle.
- Note the detailed tips and tricks for DIY Russian cake "Damskie palchiki" above in the post.