
Dieser Beitrag ist auch verfügbar auf:
![]() Deutsch
Deutsch
Creamy, delicate and heavenly delicious are the Russian tarts “Penyochki”, which were so popular during the Soviet era. With their fairy-tale appearance, they are also an eye-catcher on any dining table and are perfect for a party. Here I’ll show you how to make the mini tree stump cakes yourself. It’s much easier than you might think at first. You can find a detailed recipe for the tarts “Penyochki” with exact quantities and step-by-step instructions here at the very bottom.
What does the name of the tarts mean?
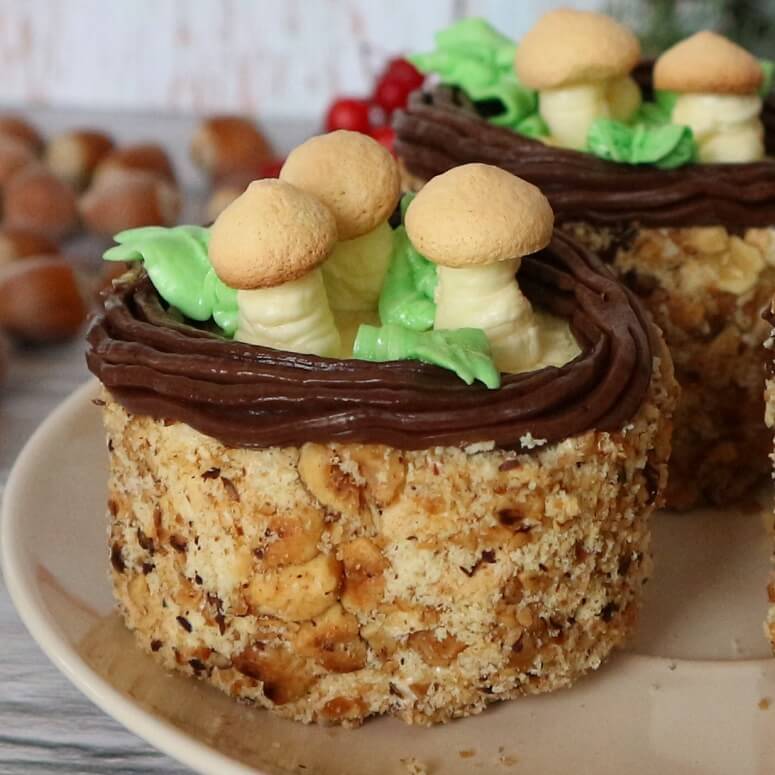
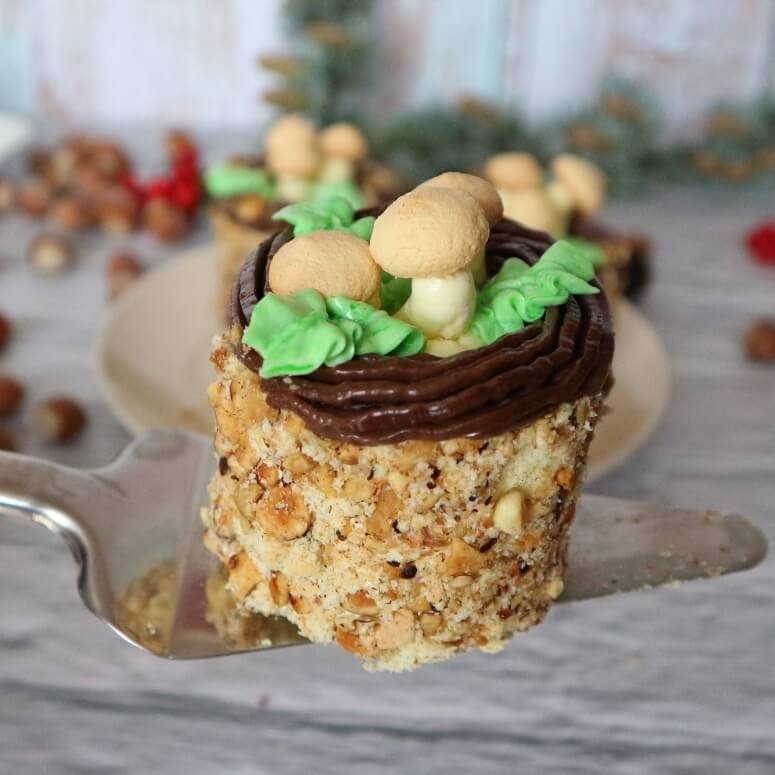
The word “Penyochki” translated from Russian means “little tree stumps”. Why the tarts were named this way is probably self-explanatory. Each mini cake has the shape similar to a small tree stump and is also decorated accordingly, namely with small “mushrooms” and “leaves” that “grow” on the “tree stumps”.
Taste of Soviet childhood
The tarts “Penyochki” were very popular in the Soviet Union. Especially children at that time were enthusiastic about the pretty, fairy-tale dessert in the form of small tree stumps with sweet “mushrooms” and green “leaves” on them. If you saw it at the counter of a pastry shop, you just couldn’t walk by without getting one from your parents. But adults also loved the adorable mini tree stump cakes.
What are the Russian mini tree stump cakes made of?
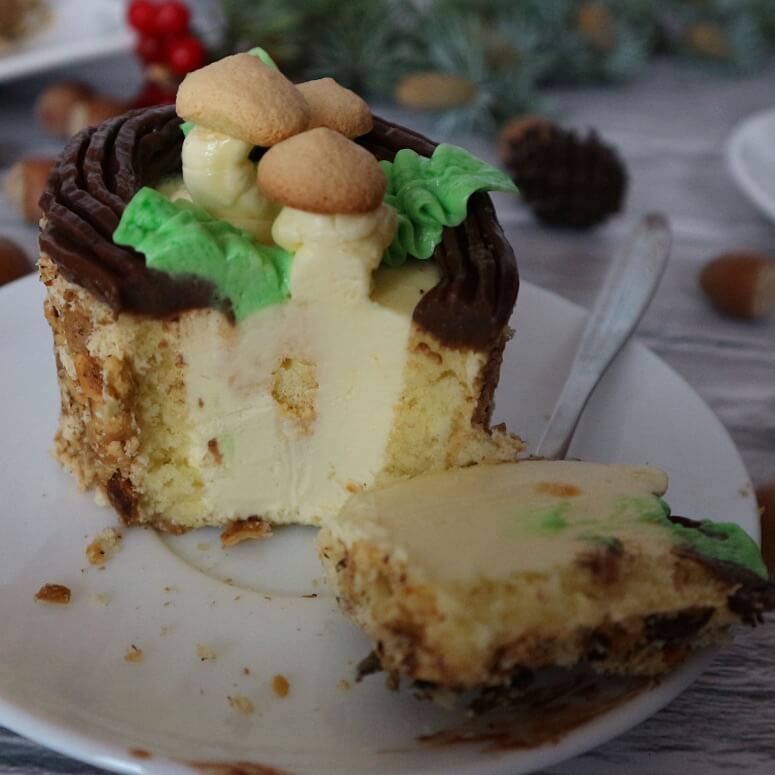
Even though the tarts “Penyochki” look unique and taste delicious, they consist of two quite ordinary components. Namely, these are a classic sponge cake and the buttercream filling. The fluffy, soft sponge perfectly combines with the creamy, delicate filling. Beautifully decorated, the mini tree stump cakes are not only tasty, but also visually a sweet highlight on any dining table.

Chocolate cream and alternative to the classic cream
If you are more into chocolate dessert, you can make the tarts “Penyochki” with chocolate cream. To do this, make the classic butter cream according to the recipe below, add about a tablespoon of cocoa powder in the last step together with rum or cognac and whip it into a homogeneous chocolate cream.
If you are looking for a faster alternative to the classic cream for the tarts “Penyochki”, you can simply whip soft butter and sweetened condensed milk in a ratio of about 1:1 for about 5 minutes to a fluffy creamy mass, and you will have a delicious cream for the Russian mini tree stump cakes ready.
What tools do I need to decorate the tarts “Penyochki”?
Classically, the Russian mini tree stump cakes are decorated with small “mushrooms” and green “leaves”. The mushroom stem is made of the tart cream, and the mushroom hat is baked from the sponge cake dough. To pipe the mushroom caps out of the pastry, you’ll need a piping bag with a round hole nozzle. To pipe the mushroom stems from the cream onto the tarts, you will again need the piping bag with the round hole nozzle. To make the green leaves, use the piping bag and a leaf piping nozzle from the cream that is previously colored with a green food coloring. I also used the piping bag and closed star nozzle to make a border of the chocolate cream on each tart. For this I added a small amount of cream with cocoa powder.
The tarts “Penyochki” are
- fluffy,
- tender,
- soft,
- creamy,
- delicious,
- a sweet eye-catcher on the dining table,
- easy to make from common ingredients,
- ideal for a celebration,
- classic of Russian cuisine.
How to make tarts “Penyochki” yourself: the recipe
Although the making of the mini tree stump cakes may seem elaborate at first, in reality it is not so difficult. You can decorate the tarts just as you like, according to your taste. Here you can get a rough idea of how the making works and what you need for it. You can find the exact quantities and step-by-step instructions on how to make the Russian tarts “Penyochki” yourself, as always, here below in the box recipe.
First you need to make the sponge dough. For this you need eggs, sugar, flour and vanilla. First, separate the egg whites from the yolks, beat the whites with sugar and vanilla until stiff, then stir in the egg yolks. Now fold in flour, spread the dough on a baking sheet, bake the sponge and let it cool.
To soak the sponge cake, quickly make the sugar syrup. Boil water with sugar, let it cool and add some rum or cognac. Soak the sponge cake with it.
Now you have to make the cream for the tarts. For this you need milk, sugar, egg, butter, vanilla and maybe some rum or cognac. First, mix the egg, milk and sugar in a saucepan, simmer it briefly, stirring constantly, until the mixture thickens a bit, and let it cool. Then whip soft butter until fluffy, add the cooked mixture in portions and vanilla and rum or cognac at the end and whip everything into a fluffy cream.
Now spread the sponge cake with the cream and roll it up, then coat the outside of the roll with the cream and roll it in chopped nuts. After that, the cream has to set, so you chill the roll. After that, cut it into tarts and decorate them. For detailed instructions on how to decorate the mini tree stump cakes in the classic way, see the recipe below.

How to make the mini tree stump cakes: tips and tricks
- Use room-warm eggs for the sponge cake. This allows the sugar to dissolve more quickly when beaten.
- It’s best to add flour to the egg-sugar mixture through a sieve so that no lumps form in the batter and you don’t have to stir it too long.
- I had gotten 9 tarts according to the recipe below here, and placed three “mushrooms” on each tart. Accordingly, I needed 27 mushroom caps, so 27 very small cookies to take off from the dough. Depending on how many mushrooms you want on each tart, you may need to make more or fewer mushroom caps. It’s best to set a few more cookies out of the dough than you need, so you can weed out any that don’t get as nice a shape close to baking.
- Don’t leave the “mushroom hats” unattended in the oven, because they will be done quickly and could burn otherwise.
- Do not spread the dough for the sponge cake on a hot baking tray, i.e. on the baking tray on which you have just baked the “mushroom caps”, but use a second baking tray for this.
- Do not bake the sponge longer than necessary, otherwise it may crack when rolled up. It should have a light yellow color after baking. To check if the sponge is done baking, press gently on its surface with a finger for a short time about in the middle. If it springs back after pressing, and no marks remain to be seen, it is ready.
- You can omit alcohol from both the cream and the sugar syrup.
- You can use any nuts to roll the tarts. I used hazelnuts.
- You can also make the roll the day before and let it set in the fridge overnight. The next day, cut it into tarts and decorate them.
- Store the tarts “Penyochki” in the refrigerator. They will keep for about 3 days.
Did you make the tarts “Penyochki” according to this recipe? I’m looking forward to your result, your star rating and your comment here below, how you succeeded and tasted the Russian mini tree stump cakes.
Got an appetite for more delicious cupcakes? Try them too:
- Slices “Shkolnoe” – popular Russian shortbread jam bars
- Napoleon tarts: recipe for quick mini variant of the Russian cake
- Korzinochki – popular Soviet shortbread tarts with meringue filling
- Mini chocolate sponge cakes – easy recipe for chocolate eye-catchers
- “Little stairs” – Soviet sponge tarts with walnut & caramel buttercream

Tarts "Penyochki" (Russian mini tree stump cakes)
Equipment
- piping bag
Ingredients
for the dough
- 3 eggs (room temperature)
- 90 g sugar
- 90 g flour
- vanilla
- 1 pinch of salt
for the cream
- 250 g butter (room temperature)
- 150 ml milk
- 170 g sugar
- 1 egg
- 1 tbsp rum or cognac
- vanilla
for the sugar syrup
- 65 ml water
- 65 g sugar
- 1 tbsp rum or cognac
for rolling
- 100 g of any nuts (roasted and chopped)
for decorating
- some cocoa powder
- green food coloring
Instructions
Preparation of the dough
- Separate egg whites from yolks. Beat egg whites, sugar, vanilla and salt until stiff.
- Add egg yolks one at a time, beating briefly each time to form a homogeneous fluffy mixture.
- Fold flour into the egg-sugar mixture to make a fluffy, thick batter.
- Fill a small amount of dough into the piping bag with the round hole nozzle and place approx. 30 very small round cookies on a baking tray lined with baking paper, leaving a little space between each cookie. Bake the cookies, which will later represent mushroom caps on the tarts, in a preheated oven at 180 °C top and bottom heat for about 3 - 5 minutes and let them cool.
- Spread the remaining batter evenly on another baking sheet lined with baking paper, bake in a preheated oven at 180 °C top and bottom heat for about 7 minutes until the sponge gets a light yellow color and let it cool. Then place the sponge on a clean sheet of baking paper and remove the baking paper on which it was baked.
- Cut off about 0.5 cm from each side of the sponge cake and crumble it. Mix the crumbs with roasted and finely chopped nuts.
Preparation of the sugar syrup
- Put sugar and water together in a small saucepan, boil briefly while stirring constantly so that the sugar dissolves before it boils, and let the sugar syrup cool.
- Add rum or cognac and stir.
Preparation of the cream
- Mix egg with milk in a saucepan with a thick bottom.
- Add sugar and mix until a homogeneous mass. Put it on the stove, bring it to a boil over medium heat, stirring constantly, and then continue to boil it over medium heat, stirring constantly, for about 2 minutes, until the mixture has thickened a bit. Then take it off the heat and let it cool to room temperature, stirring occasionally.
- Beat softened butter for about 3 - 4 minutes until fluffy and white.
- Add vanilla as well as in small portions the cooled cooked mass to the butter and beat it each time to a homogeneous airy cream.
- Add rum or cognac and whip again briefly to a homogeneous cream.
Preparation of the tarts
- Soak the sponge cake with the sugar syrup.
- Pour about 1/3 of the cream into a clean container and set aside for the time being.
- Spread the remaining cream evenly on the sponge and roll it up from the longer side.
- Spread the roll very thinly on all sides with a small amount of the cream set aside, rolling it back and forth on the baking paper. Refrigerate the leftover cream, you will need it later for decorating.
- Sprinkle the crumbs-nuts mixture on the baking paper lengthwise next to the roll (leave some of it and put it aside for now) and roll the roll back and forth until it is completely rolled in the crumbs-nuts mixture. Then wrap the roll in baking paper and then in plastic wrap and refrigerate for about 2 hours.
- Remove the plastic wrap and baking paper from the roll and cut it into 9 slices about 3 inches thick.
- Roll each slice from one of the cut sides in the crumb-nut mixture set aside and spread the tarts, rolled side down, on a flat plate or cutting board.
Decorating the tarts
- Put some of the cream you left for decorating in a clean small bowl, add some cocoa powder and mix it to a homogeneous chocolate cream. Pour the chocolate cream into the piping bag with the closed star nozzle and place a border of chocolate cream on the surface of each tart.
- Pour some of the white cream into the piping bag with the round nozzle and place three mushroom stalks next to each other on the surface in the center of each tart. Carefully place a mushroom cap on each mushroom stem (small cookies that you made from the sponge dough beforehand).
- Color the remaining cream with green food coloring, fill it into the piping bag with the leaf piping nozzle and place three leaves between the mushrooms on each tart.
- Refrigerate the tarts "Penyochki" for about 1 hour.
Notes
- Do not leave the "mushroom caps" unattended in the oven, because they are ready quickly and could otherwise burn.
- Do not bake the sponge longer than necessary, otherwise it could crack when rolled up. It should have a light yellow color after baking. To check if the sponge cake is done baking, gently press its surface with a finger briefly about the center. If it springs back after being pressed, and no marks remain visible, it is done.
- Alcohol in the cream and sugar syrup is alternative.
- The roll can be made a day ahead and placed in the refrigerator overnight. The next day it is then cut into tarts, and the tarts are decorated.
- Note the detailed tips and tricks for making the tarts "Penyochki" above in the post.