Dieser Beitrag ist auch verfügbar auf:
![]() Deutsch
Deutsch
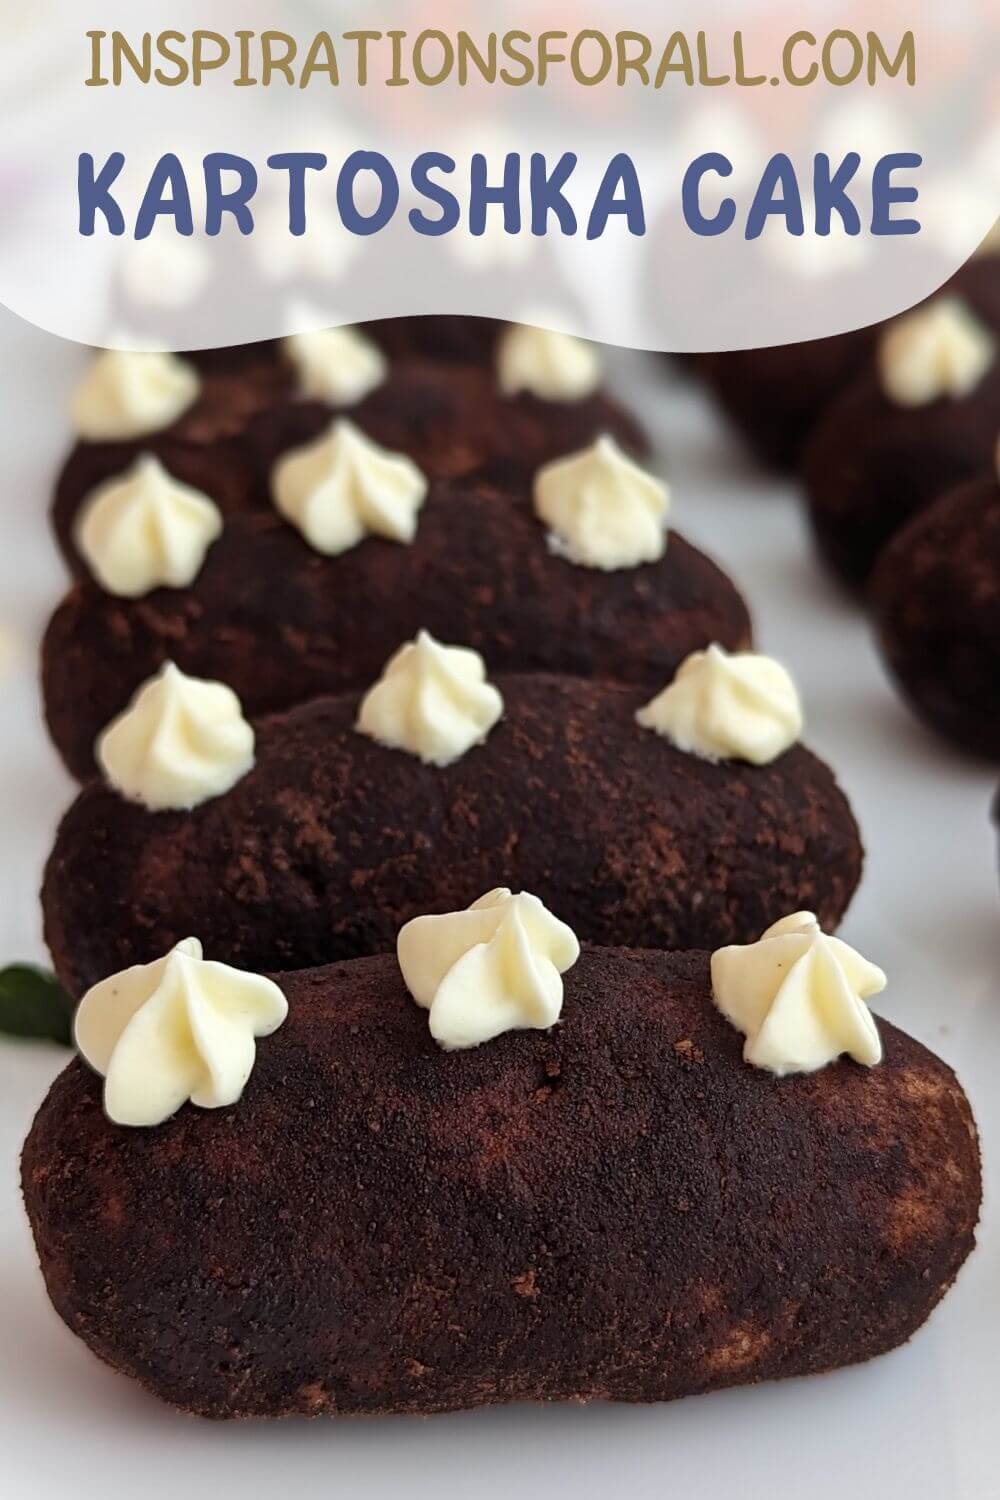
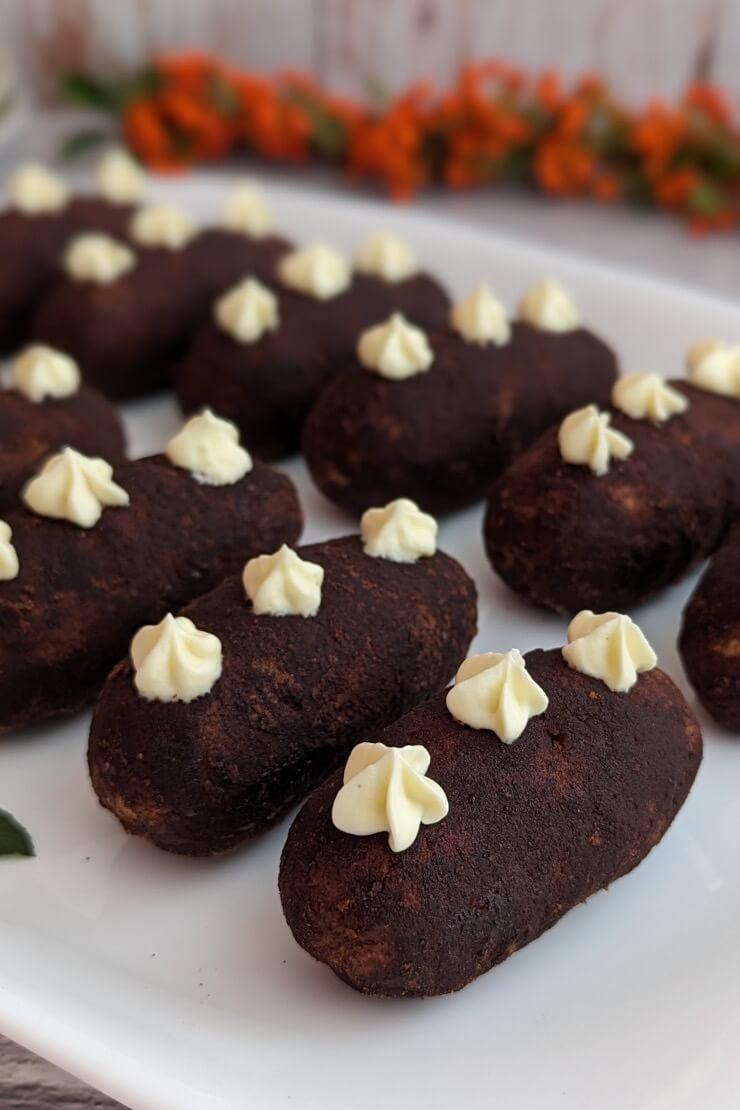
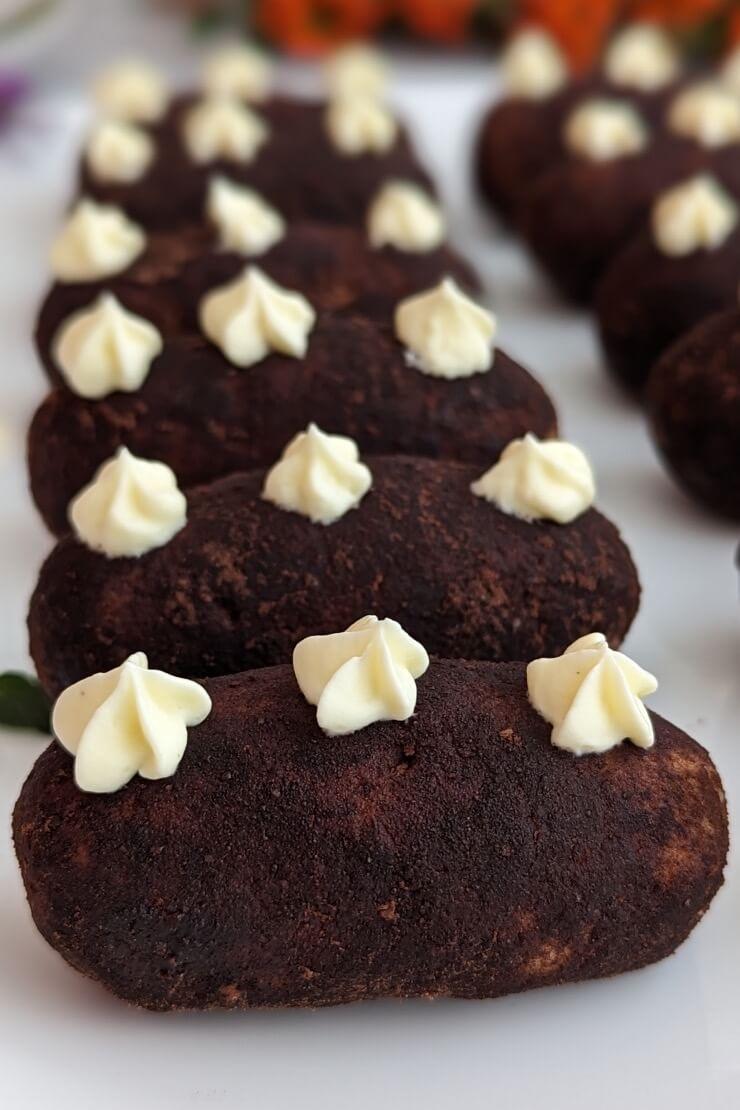
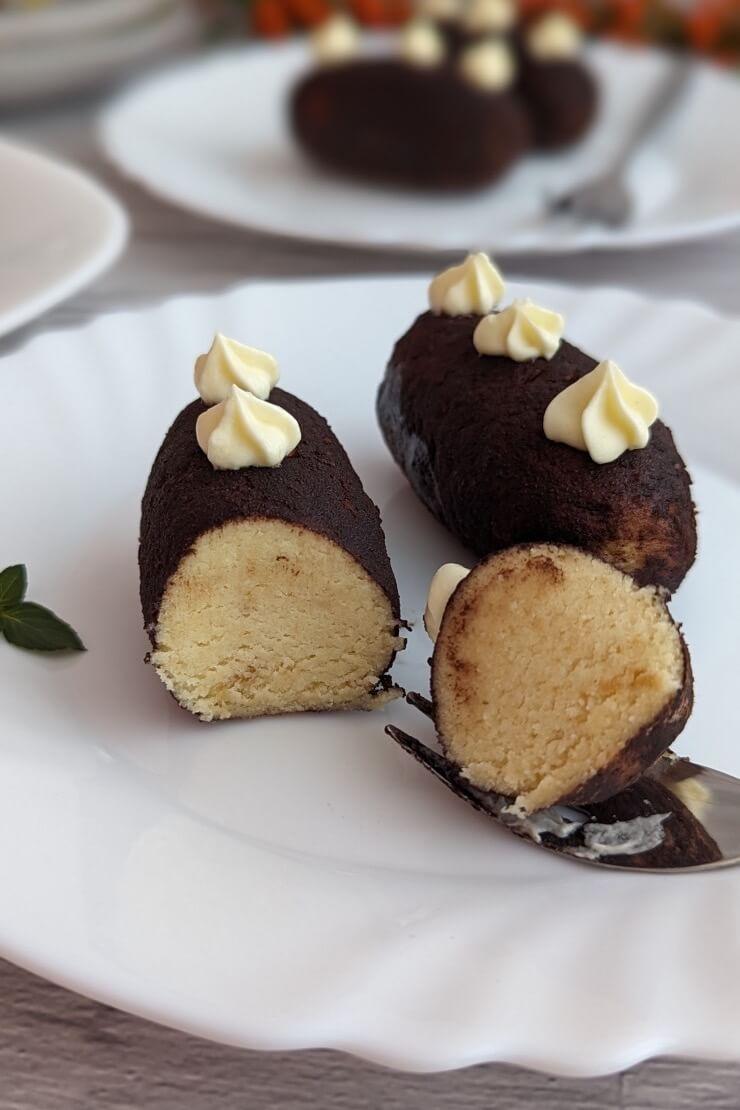
Incredibly moist, tender and so delicious taste these Russian mini cakes “Potatoes”. Not without reason, they were one of the most popular dessert of the Soviet era, which you could enjoy in any pastry shop. Meanwhile, you can easily make it at home. You can find a detailed classic kartoshka recipe with the exact quantities and step-by-step instructions here at the very bottom.
Classic kartoshka with sponge cake
Although there are now quick no baking kartoshka recipes, such as kartoshka made from cookies or kartoshka made from rusk, the classic mini cakes in Soviet times consisted of sponge cake and butter cream.
Soviet confectioners often used leftover sponge cake from various cakes for this purpose, such as the cake “Charodeyka” or the cake “Slavyanka”. For this reason, the kartoshka cake, which was enjoyed in a cafetera, did not necessarily have a light core. Because it could also be made from chocolate sponge cake leftovers or from a mixture of chocolate and vanilla sponge cake.
By the way, try my chocolate kartoshka recipe too.
Make sponge cake or use leftovers
This kartoshka recipe is a great way to utilize leftover sponge cake you may have at home. For example, after making the mini chocolate mousse cake “Eva”, you will have some of the sponge left over.
Keep in mind that the drier your sponge cake scraps are, the more butter cream you’ll need for them. The sponge mixture must be easy to shape, like for the cake pops or a little softer. Therefore, first take a little less sponge, mix it with the cream and add the remaining sponge crumbs as needed.
Of course you can make the classic sponge cake base for the kartoshka, like I did. Then let it dry overnight at room temperature before making the crumbs.
What can I prepare the day before?
You should make the sponge cake the day before. Then it can dry a little overnight at room temperature. This makes it easier to crush into fine crumbs the next day.
You can also make the milk syrup for the cream the day before. Let it cool and store it in the refrigerator overnight.
Before preparing the cream, let the milk syrup warm up at room temperature for at least an hour. This is because butter and the milk syrup must be room warm and both at about the same temperature so that they can combine well into a homogeneous cream when whipped. It is the same with the cream for the Leningradsky cake and the cake “Skazka”.
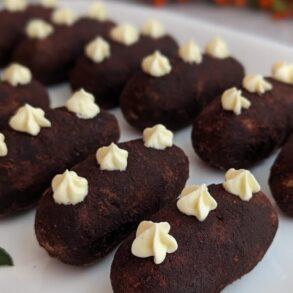
Perfect for party or as a gift
You can serve the kartoshka cakes not only for dessert during the week, but also at a party. With their unique look, they are guaranteed to attract the attention of all guests. Along with the mini cakes “Nezhnost” and eclairs, the Russian mini cakes “Potatoes” will make your coffee table perfect.
They are also perfect as a sweet gift from the kitchen, just like the chocolate peanut clusters or marzipan potatoes. Pack it in a pretty paper box and surprise your loved ones with it for Christmas or Easter, for example.
This kartoshka is
- heavenly moist,
- tender,
- creamy,
- soft,
- incredibly delicious,
- aromatic,
- easy and quick to make,
- a sweet eye-catcher on every coffee table,
- ideal for dessert during the week or for a party,
- classic of the Soviet cuisine.
Classic Russian mini cakes “Potatoes” recipe
Although the classic kartoshka recipe does not work without baking, it is still very simple. You can also divide the preparation into two days.
Step 1:
First, make the classic sponge cake. Beat eggs with sugar until fluffy and then add flour. Bake the sponge cake on a baking sheet and let it rest for about 12 hours.
Step 2:
For the cream, first boil milk, egg and sugar to make a milk syrup and let it cool to room temperature. Then whip soft butter until fluffy and stir in the milk syrup in batches, as well as vanilla and possibly a little rum or cognac.
Step 3:
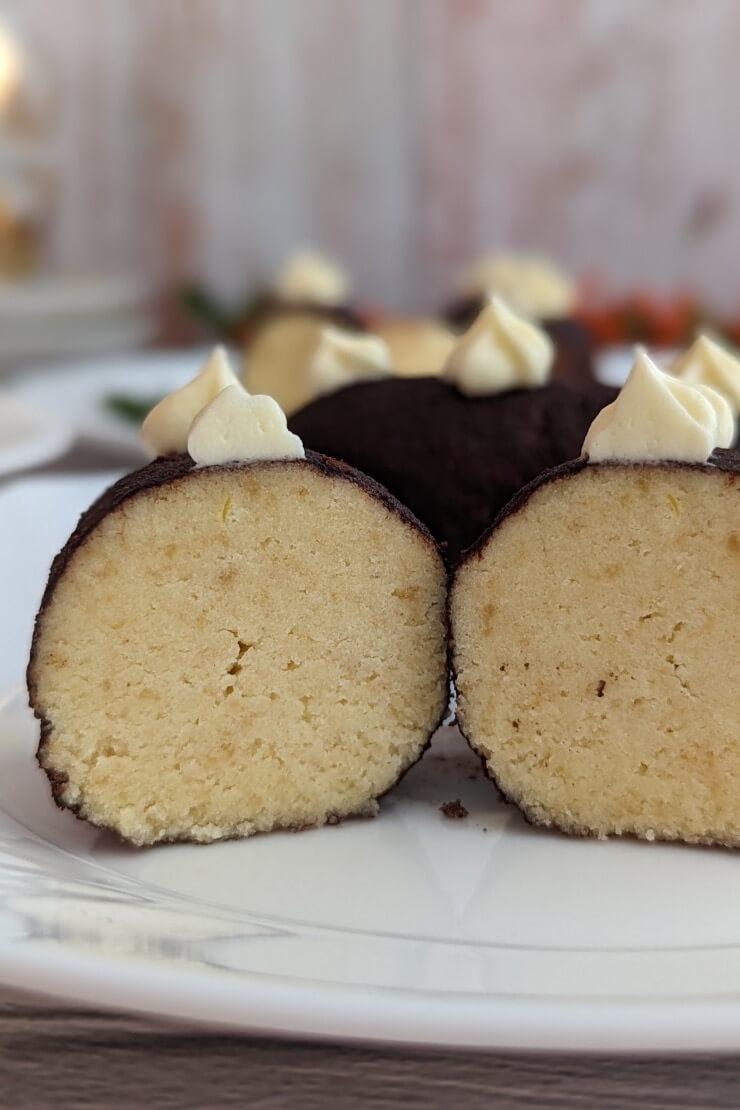
And now you can prepare the mini cakes. To do this, finely crumble the sponge cake and mix the crumbs with the butter cream. Form small “potatoes” from the mixture and roll them in a mixture of powdered sugar and cocoa powder. After the kartoshka has been left in the refrigerator for a while, it is ready to be served.
How to make kartoshka: tips and tricks
- You can use any leftover sponge cake for this recipe if you have some at home.
- Depending on how dry your sponge cake base is, you might need a little more or less butter cream for it. The sponge mixture for the Russian mini cakes “Potatoes” needs to be easily moldable. It shouldn’t be dry, but it shouldn’t be mushy either.
- You can omit rum from the cream. However, it gives the kartoshka a special aroma.
- Butter and the milk syrup must be room warm and both at about the same temperature when they are whipped into the cream. This allows them to combine well into a homogeneous cream without lumps.
Did you make the kartoshka cakes using this classic recipe? I’m looking forward to your result, your star rating and your comment here below on how you succeeded and tasted the Russian mini cakes “Potatoes”.
Looking for more Soviet era mini cakes recipes? Try some more:
- Tarts “Penyochki” – popular Soviet mini tree stump cakes
- Mini cakes “Bouchee” – legendary dessert of the Soviet era
- Mini cake “Konstantinovskoe” – Soviet dessert with nostalgia
Kartoshka classic
Ingredients
for the sponge cake
- 6 eggs
- 160 g sugar
- 160 g flour
- 1 pinch of ground vanilla bean
- 1 pinch of salt
for the cream
- 250 g butter room warm
- 150 ml milk
- 170 g sugar
- 1 egg
- 1 tbsp rum alternatively
- 1 pinch of ground vanilla bean
for rolling
- 20 g powdered sugar
- 10 g cocoa powder
Instructions
Preparation of the sponge cake
- Beat eggs, sugar, vanilla and salt for approx. 10 - 15 minutes until a light and airy mixture.
- Fold in flour to make an airy, thick sponge batter.
- Spread the batter evenly on a baking sheet lined with baking paper and bake the sponge cake in a preheated oven at 356 °F (180 °C) for approx. 15 minutes.
- Allow the sponge cake to cool and let it dry a little overnight at room temperature.
Preparation of the cream
- Mix egg and sugar in a saucepan with a thick bottom.
- Pour in milk and mix thoroughly.
- Put the milk mixture on the stove and bring it to a boil, stirring constantly.
- Then cook it for about 3 minutes, stirring constantly, until it thickens slightly, and let the milk syrup cool to room temperature, stirring occasionally.
- Beat softened butter with vanilla until light and fluffy, about 5 minutes.
- Add the milk syrup in batches, beating each time until homogeneous.
- Add rum and whip again briefly to a homogeneous butter cream.
Preparation of the kartoshka cakes
- Finely crumble the sponge cake and put it in a large mixing bowl.
- Leave about 1 tablespoon of the butter cream for decorating.
- Add the remaining cream to the sponge crumbs and mix to a homogeneous, easily moldable mass.
- Form small "potatoes" out of the sponge mixture (for me 18 mini cakes of approx. 50 - 51 g each).
- Mix powdered sugar and cocoa powder.
- Roll the mini cakes "Potatoes" in the powdered sugar and cocoa powder mixture and decorate them with the butter cream set aside.
- Refrigerate the kartoshka cakes for about 2 hours.
Notes
- Depending on how dry your sponge cake base is, you might need a little more or less butter cream for it. The sponge mixture for the Russian mini cakes "Potatoes" needs to be easily moldable. It shouldn't be dry, but it shouldn't be mushy either.
- You can omit rum from the cream. However, it gives the kartoshka a special aroma.
- Butter and the milk syrup must be room warm and both at about the same temperature when they are whipped into the cream. This allows them to combine well into a homogeneous cream without lumps.
- The time for cooling the sponge cake base and milk syrup is not included in the preparation time.
- Note the detailed tips and tricks for making the classic kartoshka at the top of the post.
If you are using Pinterest, you can pin the following picture: